Workflow
How composers deliver stems
Composers deliver stems by exporting individual instrument groups from their DAW as separate WAV files at the same sample rate, length, and start point as the master, then bundling them with clear filenames and metadata. Done right, stems make a track endlessly usable. Done wrong, they are a tangled mess that no editor will touch.
Stem delivery is one of those tasks that sounds simple and turns out to be where many composers lose placements. The supervisor or editor needs to drop your stems into a session, mute and solo at will, and have everything line up to the millisecond. The mechanics of getting that right come down to consistent export practice, sane naming, and metadata discipline.
Who does this
Working composers across film, TV, trailer, ad, and game music. Production music libraries that license cues with stems included. Sync agencies that bundle stems with their pitches.
Less commonly: indie artists who realize that delivering stems with their masters dramatically increases the chance of sync placement. The artist who delivers a vocal-only stem when a supervisor asks gets more sync deals than the artist who only has the stereo master.
Step by step
- 1
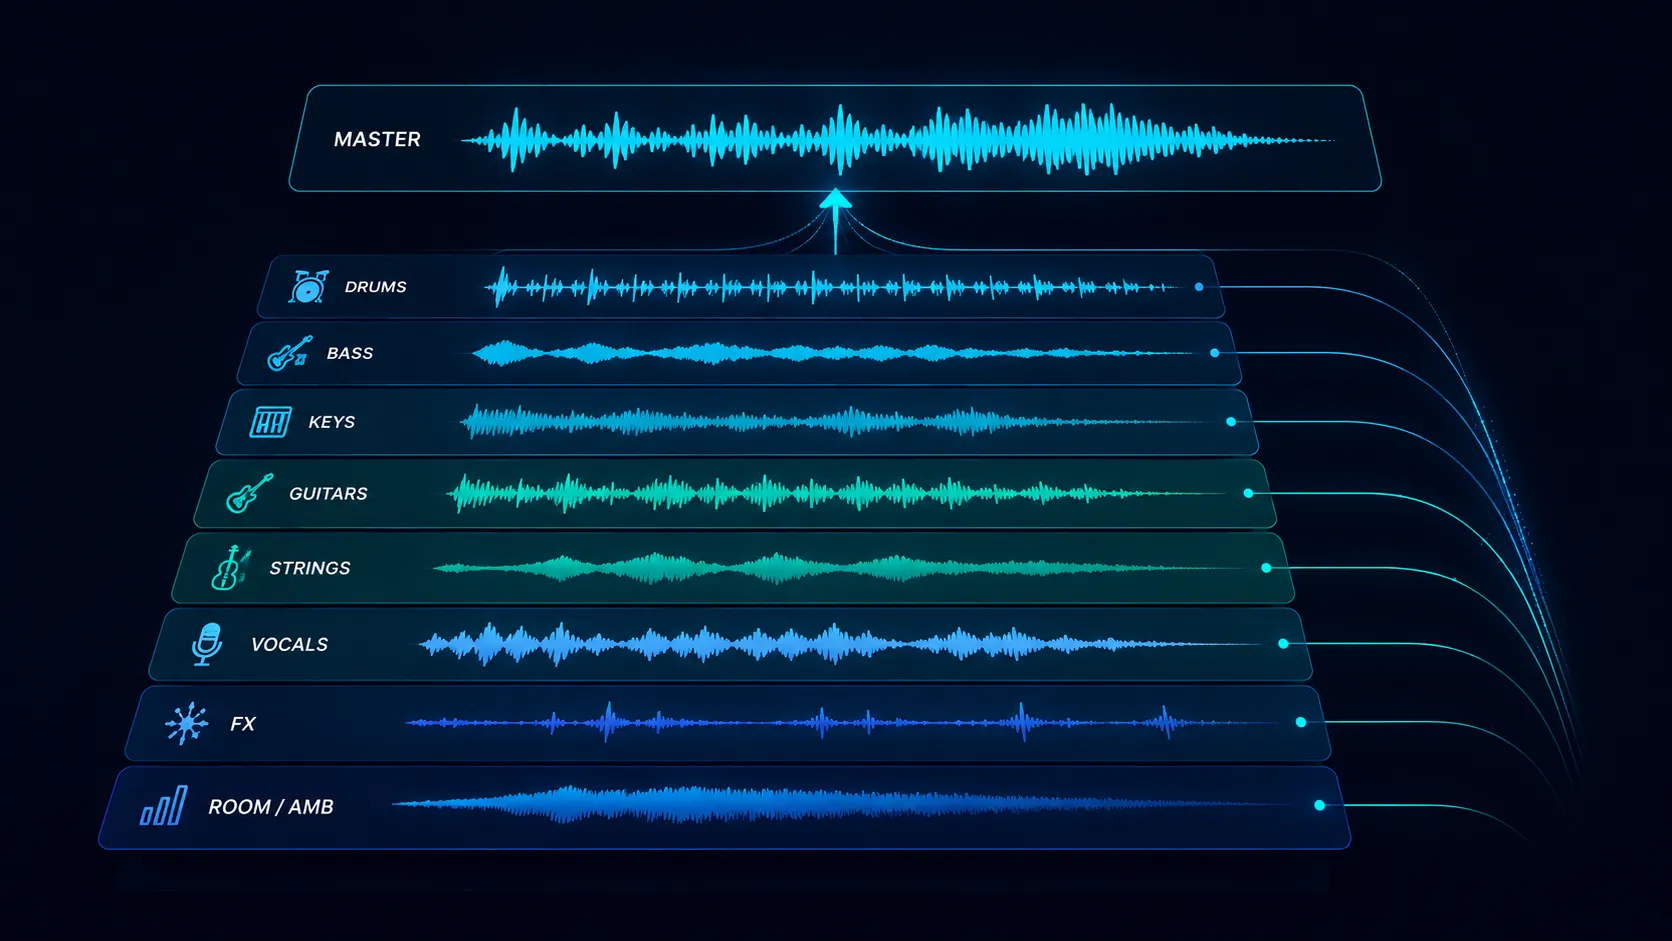
Decide your stem groupings before you mix
Stems are not the same as individual tracks. A typical stem set groups related instruments: drums (kick, snare, hat, percussion all printed as one stereo file), bass, keys, guitars, strings, vocals, FX. Decide the grouping before you finish the mix because the stems need to play back as a coherent reduction of the full song.
- ✓Drums printed as one stem unless asked otherwise
- ✓Vocals as one stem (or lead and BG separated for some clients)
- ✓FX/atmos as one stem
- ✓Aim for 6 to 10 stems total, not 60 individual tracks
- 2
Export at the source sample rate and bit depth
Match the master. If the master is 24-bit 48kHz, every stem is 24-bit 48kHz. Trailer and broadcast clients expect 48kHz. Consumer streaming masters at 44.1kHz can stay at 44.1kHz unless the buyer requests otherwise. Mixing sample rates inside a stem bundle causes silent re-sampling artifacts at the editor's end.
- ✓Trailer / broadcast: 24-bit 48kHz minimum
- ✓Streaming consumer: 24-bit 44.1kHz acceptable
- ✓Avoid mixing sample rates in a single bundle
- 3
Print stems from bar 1 of the song to the final bar
Every stem must start at the same timecode as the master and end at the same point. If the kick comes in at bar 9, the drum stem still starts at bar 1 with 8 bars of silence. This is what makes the stems line up automatically when dropped into a session.
- ✓Same start point on every stem
- ✓Same length on every stem
- ✓Tail handles (the final reverb fade) included
- 4
Apply mix bus processing strategically
Decide whether your stems are pre-bus or post-bus. Pre-bus stems sum to a slightly different mix than your master, but give the editor maximum control. Post-bus stems include your master compression and EQ, which preserves your sound but limits flexibility. Most clients want pre-bus stems with bus processing printed separately as a "master FX" stem.
- ✓Pre-bus: more flexibility, sums slightly differently
- ✓Post-bus: matches master perfectly, less editor control
- ✓Best practice: pre-bus stems plus a separate master bus printout
- 5
Check the stem sum equals the master
Sum the stems back together in a fresh session. The sum should match your master to within a couple dB. If it does not, something is missing or double-printed. This is the most-skipped step that causes the most editor headaches downstream.
- ✓Pull stems into a session, group, set unity gain
- ✓Sum should match master to within ~2 dB
- ✓Mismatch usually means a missing FX bus or duplicated send
- 6
Name files consistently and clearly
Filenames are the metadata that travels with the file forever. "Track Title - Drums.wav" is good. "Beautiful Tomorrow - Drums.wav" is better. "Drums_v3_FINAL_FINAL.wav" tells the editor nothing and gets re-named on import. Use a consistent template across every project.
- ✓Format: "Song Title - Stem Name.wav"
- ✓Stem names: Drums, Bass, Keys, Guitars, Strings, Vocals, FX, Master
- ✓Match capitalization across the bundle
- 7
Embed metadata in the WAV files
WAV files support BWAV metadata: artist, title, composer, year, ISRC, originator, time reference. Set this in your DAW export dialog or with a tagging tool. Many editors import stems straight into a session and the metadata follows the file. A stem with empty metadata is half a delivery.
- ✓BWAV preferred for trailer / broadcast
- ✓Title, artist, composer at minimum
- ✓ISRC if the master has one
- 8
Bundle and deliver via shareable URL
Zip the stem files plus a one-page text manifest listing what is included. Upload to a sharing platform that gives the supervisor a single URL. Avoid email attachments. Avoid raw cloud-storage folders that will go stale or get deleted in 90 days.
- ✓Zip is fine for stems if filenames inside are clean
- ✓Manifest text file with stem list and notes
- ✓Single URL beats folder-of-loose-files
- 9
Deliver ALT mixes alongside stems
Stems are infrastructure. ALT mixes are pre-baked options. Always deliver: instrumental version (vocals removed), TV mix (vocals reduced for talk-over), 60-second cutdown, 30-second cutdown, and a 15-second sting. The editor uses these first and only goes to stems when none of the ALTs fit.
- ✓Instrumental is the most-licensed ALT
- ✓TV mix (vocals down 6 to 9 dB) is the second most-used
- ✓60s and 30s cutdowns standard for ad and trailer
- ✓15s sting for transitions and bumpers
- 10
Maintain stem versions when the master changes
If the master gets re-mixed or re-mastered after delivery, the stems need to be re-printed too. A common mistake is updating the master and forgetting that the existing stems no longer line up. Stem versioning matters once a track has been licensed multiple times.
- ✓Master remix triggers stem re-print
- ✓Tag stem versions with date or revision
- ✓Old stem bundles get archived, not overwritten
What can go wrong
- ●Stems that do not sum to the master. The editor catches this within 30 seconds of importing, then has to email you for a fix. You just lost the placement to a composer with cleaner stems.
- ●Inconsistent start points. If your bass stem starts at bar 1 and your drum stem starts at bar 9 with no leading silence, the editor cannot align them automatically.
- ●Mixed sample rates inside a bundle. Pro Tools will silently re-sample the odd-one-out file, introducing artifacts the editor will eventually notice and blame on you.
- ●Missing FX or sends. The classic mistake: the kick has a parallel compression bus that you forgot to print. The drum stem sounds wrong without it.
- ●Filenames that mean nothing. "Track1_v3.wav" makes the editor curse you. Spend the 60 seconds to name your stems properly. Forever-future-you will thank you.
Pro tips
Build a stem export template in your DAW once and reuse it on every project. The template defines your stem groups, your bus printouts, your naming convention, and your metadata fields. You set it up once and every project is consistent forever.
Print a "minus-vocal" alternate even when not asked. The number of times a supervisor calls back asking for the instrumental is enormous. Having it ready is the difference between same-day delivery and a 48-hour scramble.
When you can, deliver stems alongside the original masters in your initial pitch, not on request. A composer whose pitch playlist already has stems linked gets more callbacks because the supervisor can hand the link to an editor immediately.
Master bus processing matters. If your master has heavy bus compression that is responsible for most of the song's glue, your pre-bus stems will sound thin and unfinished. Always print a "master bus FX" stem separately so the editor can re-apply the glue when summing.
Tail handles. Always print at least 4 bars of post-final-note tail on every stem so the natural reverb decay is captured. Editors hate truncated reverb tails. Adding 4 bars of silence-with-tail at export costs you nothing and saves callbacks.
Tools that help
DropCue
DropCue auto-groups stems and ALT mixes under their parent track in the playlist. The supervisor or editor sees one playlist entry, expands it, and sees every variation neatly organized. No more 30-file folder chaos. The composer uploads once, the listener accesses everything from a single URL.
WeTransfer / Dropbox
The default for many composers. Functional for one-off deliveries. Painful when you are sending stems weekly: links expire, folders go stale, no analytics on whether the editor actually downloaded.
Splice / Disco / SoundCloud
Each handles a piece of the workflow. Splice for cloud DAW backup. Disco for catalog management. SoundCloud for casual sharing. None of them are purpose-built for the composer-to-supervisor stem delivery loop.
BWAV tagging tools (Wave Agent, BWF MetaEdit)
Free tools that batch-edit BWAV metadata. Useful when your DAW does not export full BWAV metadata by default (looking at you, older Pro Tools versions).